Sunday, July 28, 2013

Cookie Cake: Minecraft Edition

Hello friends!  Another beautiful weekend has come to an end, and we're not sure where all the time has gone.  Probably into the kitchen, where we've spent a good chunk of our weekend.

We had a fun task this weekend of making a very different birthday cake: a Minecraft themed cookie cake.  Carson's birthday party is Tuesday, but he's not a fan of cookie cake.  That's ok, though, because his mom told us he was a huge lover of cookie cake (who isn't?)  She wanted to know if we could make a cookie cake themed after a video game he loves, Minecraft.


If you've never played Minecraft, it's an interesting concept.  It's like Legos meets survivor meets Erector Set.  The game involves building homes out of different "element blocks", creating things through mining, and pretty much wasting a bunch of time you already don't have.  What's interesting about this game is how many people are flat out addicted to this game.  Kids as young as 5 play it, as well as some of our friends who are in their 30s.  It really doesn't have a limit to what it can do, unless your imagination limits it.

The graphics of the game is somewhat different and takes some getting used to.  Everything's very geometric and simple looking.  We felt like the game walked off our 1992 family computer.  Once you get past that, though, it's easy to become addicted.

With the idea of cookie cake as the background, we wanted a tasty cake that was decorated well.  We decided to make it 3D with some fun cookie blocks we built, that really kept true to the spirit.

So what do you think?


These pictures seem a little blank, and it's true, they're missing some things.  There are some Minecraft figurines that need to be added to the cake too, but they won't go on the cake until it's ready to be eaten.  We'll post some updated pictures later this week.

Happy birthday Carson!  Hope you have a fantastic day!!

And to the rest of you out there, hope you have a wonderful week.

**UPDATE**

Finally got a picture of the completed cake.  Looks like it was an awesome party!!


Wednesday, July 24, 2013

Open the Floodgates!

Since Pittsburgh has been receiving SO many flash flood warnings these past few weeks, we thought it would be funny (funny ironic, not funny hahaha) to bring some flooding into our own bakery.  We decided to flood some cookies.

Now our guess is the majority of you read that last sentence and pictured us dumping some delicious cookies into a bucket of water.  Why in the world would we ruin perfectly good cookies like that?  No, flooding cookies is a method used to ice certain cookies, usually sugar cookies, and it's something we love to do and never seem to make time to do it.  Well we made time finally and flooded up a storm...er...maybe it's the other way around since storms cause flooding.

...anyway...

If you've never flooded cookies before, it's a fairly straight forward process.  There are a few things we suggest to all first-time flooders:


  1. Use sugar cookies (they bake with a flat top, which is essential to get a good cookie iced this way.
  2. Use simple shaped cookie cutters.  You'll see in the pictures below we used a random assortment of woodland creatures (thank you Ikea!)  DO NOT USE CRAZY COOKIE CUTTERS LIKE THIS IF YOU'VE NEVER DONE THIS BEFORE.  Stick to hearts, or squares, or another geometrically simple shape.  Trust us.
  3. Practice makes perfect.  It will take you probably a few cookies to find your groove. Do not despair if your first few look like your kids finger painted all of them.
If you have some cooled sugar cookies, you're pretty much ready to go.  Oh, but first you need some royal icing.  Of course, searching for "royal" anything this week brings up nothing but William and Kate's baby. 


No, Google, we DON'T want to read another story about this.  We actually just want a recipe we can share with our readers for royal icing.

If you've never made royal icing before, click here for a super simple recipe.  Ours is slightly different (and slightly better in our humble opinions), but we don't like to give trade secrets out on the world wide web.

The trick to flooding cookies is to build a dam to stop the icing from spilling over the side of the cookies.  And what do you build the dam with?  Why icing, of course?   This is where you will need some practice if you don't have a steady hand.  Be patient, it will become easier.  And you will find that not all of your cookies look awful after they've set.

So once you've dammed up the cookies, they look like this, nice and yummy and ready for flooding...


We think that's a bear cub.  These Swedish cookie cutters are questionable, though.

To flood, you take the same royal icing, water it down, and drip it carefully into the center of the cookie.  The hope is that your icing will spread around the top of the cookie but not overflow thanks to the wonderful white-walled icing dam you have built.


Here we're watching the icing spread.  If you're impatient like we are (who has time to slowly watch this spread??) or if there are little nooks and crannies you just can't seem to get the icing into, you may have to help it along.  You'll find tools that work for you, but we often suggest starting with a tooth pick.  Just be careful the white icing outline stay in tact.  

You will eventually get it to spread over everything, and it will be finished and ready for drying.


Once everything's spread across the cookie, it's a good idea to look for any air bubbles and pop them as well.  Again, we suggest a toothpick, but find what works for you.

If you get really fancy, you can start to add details to your cookie that will help define it better.  Below we took a snail, added a swirl, and gave it a little more character than the bear cub up above.


Once it dries completely the snail will be the cutest little thing.  You can add other items too, sprinkles, candies, you name it.  It helps to really make flooding cookies a ton of fun.

So now go practice!  Take an evening and try it out!  Let us know what you think, and how successful it was.  And if you happen to be using the same Ikea cookie cutters...give us a call!!

Happy Wednesday!!

Sunday, July 21, 2013

Yep...It Happened

Welp, folks, our morning started off really well.  Wanted to try out a new recipe, and we figured what better day to do it than an overcast Sunday in Pittsburgh.

Then...well, then this happened...


One cookie cake in 20 pieces on our counter.  Yep.  Happy Sunday to us!

We've told you many times for every wonderful thing we make we make an equal mess that ends up in the garbage.  Here's proof.

If you're in the area, though, it tastes delicious.  We added 3 types of chips, dark chocolate, semi-sweet chocolate, and butterscotch, as well as some walnuts.  Yummmm!! :-)


Friday, July 19, 2013

Dog Days of Summer

Man, guys, it's so hot!!

We hate this stretch of the year, when the heat and humidity just kill any motivation to bake that we have.  It's no small wonder we love baking in the winter, when it's super cold outside.

Our sister is a photographer (shameless plug, click here to view her ridiculously good photos) and she always talks about how her wedding business has a "down time", usually in the winter where not a lot of people choose to get married.  We wish we had the same "down time" in July with our baking, but alas we don't.  It seems you people always want to eat cake!


So through these hot months we crank up the air conditioning and pray for cooler days.  As in, nothing like this past week.

Nevertheless, baking still goes on.  We have quite a few orders in these hot and humid summer months, which is great news for us.  Starting a business is a ridiculously slow process (we think we've seen paint dry quicker than this business take off), but we're happy to see things starting to snowball. We have more orders now than we did a year ago, and it's a trend we're looking to continue in the coming months and years as we move into the next phase of our "Build a Bakery" stage.

We have another themed birthday next week that we're excited to tell you about in future posts.  If you follow us on Facebook you might already know what the cake is going to look like.  It should be a blast to make, and will allow us to do something we've never done before.  This blog is all about new experiences, so we're happy for the chance.

We're also trying to find some good reasons to spread our skills around for reduced or no costs.  If anyone reading out there knows of a good cause in or around the Pittsburgh area that might have need for some baked goods, give us a call.  Your talents and gifts are wonderful things, but they mean so much more when you share them with others.

We're out to go cool off the kitchen.  Wheeeew-eeey, this heatwave needs to break!

Stay cool, friends!

Sunday, June 30, 2013

Baking Up Fresh: Dr. Who Birthday Cake

Happy weekend friends!  It's mid summer, the Pittsburgh Pirates are in first place in the MLB, and we are rocking the baking as we head into the July 4th holiday weekend.  If only summer time was a little cooler so we didn't have die slightly every time we opened the oven.

This weekend we've been busy baking a themed birthday cake for our baby brother.  He's finally turning 21 (huzzah!!) and we decided to surprise him with a Dr. Who cake to ring in the anniversary of his birth.

Haven't seen Dr. Who?  It's ok, we haven't either.  So it was a little challenging when we decided to make this cake, since we don't even know what the show's about. (since making this cake, a doctor, who can apparently change actors depending on the season, can time travel, or something like that, and tries to save the world.  We think...)

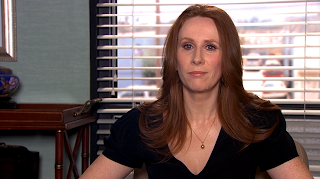
All we know is the one lady in Dr. Who is also in The Office.  So we found some comfort in that.  At least it wasn't too weird.

Since we can't make a cake of Nellie (how creepy would that be to see!!??!?!?!) we decided to go with the classic Dr. Who image: the Tardis.


We have no idea what this is actually used for in the show.  We think it's for time travel, but don't quote us on this.  We still haven't seen a single minute of this show.  However, if you type "Dr. Who" into google we guarantee images of this pop up.  So we thought, why not, let's build a Tardis out of cake.

Sounds simple...pretty straight forward too.  We forgot what a pain in the butt dying fondant navy blue is, though.  Since it's cheaper to buy fondant in bulk white, we hand-dye 95% of all our colored fondant, the only exception being black.  The darker the color is, the harder it is to dye...which is why we buy our black fondant.  But navy blue...that's about as close to black as you can get, which means it's going to take a lot of dye, a lot of kneading, and a LOT of time to get the right color.

To give you a perspective of time, it took us almost an hour to get our navy blue just the right color.  Partially because we're perfectionists, partially because we added too much black dye and it started to veer into the "grey" category.  With some work, though, we got it into the perfect shade we were looking for.  After that, it was just some simple decorating, and the cake was good to go.

Here's the finished result...what do you think?


Pretty close if you ask us.

What we loved about this baking challenge was our own lack of understanding on this cake theme: we've never seen the show, and it's not like we have the time to sit down and watch 10 episodes to get into the feel of the cake...we had to just jump right in and hope for the best.  Thankfully this show has such an iconic image we could use to replicate into a birthday cake.

Enjoy your holiday week, it's supposed to be beautiful out!!


Thursday, June 27, 2013

Cupcakes vs. Cakes

As a baker, we have created some pretty amazing treats.  Cookies, pies, cupcakes, cakes, brownies, sugar doves, Swedish rolls, tarts, and a million different types of icings.  Some less successfully than others, we'll admit, but still checking them off our list.  Our favorites, though, usually involve cake, as you faithful readers know.  There's something about a good cake that just make us smile like a Cheshire cat.

Sometimes when customers order with us, they go back and forth between whether they should order a cake or cupcakes for their event/party/wedding/Tuesday night.  We never realized what a serious decision this was until people really struggled to make the ultimate decision.  For some people, this may be the hardest decision they ever have to make.

To help with your ultimate decision, we have compiled the following arguments for choosing both cakes and cupcakes for your special occasion.  Read carefully, and may the best baked goods win!

Choosing Cupcakes

1. Cupcakes are super customizable, which is why we love making them.  For big parties you don't have to stick with one flavor that the entire group has to suffer through.  Heck, half the fun is coming up with the awesome flavor combinations you'll be serving your guests and yourself.  Classic chocolate and vanilla are always winners, but what about pistachio, or peach mango, or even beer cheese and bacon??  Kick your party up a notch with a wonderful dessert flavor adventure for everyone to enjoy.

2. Arranging cupcakes is such an art, and we love the challenge.  At events, it's so much fun to figure out how we're going to arrange the cupcakes for guests to admire, oogle over, and eventually devour.  We've done simple things like tiered platters, and fun designs that involve cake platter, old books, and even cereal bowls.  Staging cupcakes can help tie a theme together, and in larger parties they can be spread to separate locations throughout the party to cut down on lines and potential accidents.  


3. On average, cupcakes will cost you less.  If you have 100 people attending your wedding you order, say, 10 dozen cupcakes for the big day, so you have a few extras on hand.  If the extra 20 cupcakes are there at the end of the night, looks like you have some treats for after the honeymoon, enough to make you happy but not enough to put the bulge on too early into your marriage.  It's a win-win!

With cake, a lot of times you are at the mercy of the "serving size".  The amount of cake you have to buy, and get rid of depends on who is serving it, how much a "serving size" is to them, and how much extra you'll have to buy.  They can't chop half a layer off a cake if you don't need that much--if you buy a 3-tiered cake, you're stuck with all the leftovers, even if you don't want it.  Sure the extra cake is fun to eat for awhile...but eventually, your freezer and your stomach will hate you.

Choosing Cake

1. Cake is the traditional choice.  Sometimes cupcakes just aren't the proper dessert to serve at a function.  Cakes give you that beautiful, elegant drama that cupcakes will never be able to replicate.  If you're going for a bold look, or feel the event won't be as successful with cupcakes, then choosing a cake is definitely the way to go for your event.


2. Cakes tell a story.  While you can place cupcakes in and around a themed setup, it's hard for them to truly portray an emotion other than fun or whimsical.  The size of cupcakes limits the scope of beauty they can present.  Cakes don't have that problem, and can definitely bring the "wow" factor you were missing from a party or event that wasn't there before.

3. Cakes let the creativity flow.  Themed cakes can be as crazy, bright, bold, daring, and elegant as you can imagine.  They can be in any shape imaginable, in any color, in any size, in any flavor.  Cupcakes have some limitations, being trapped in a wrapper.  If you want off-the-wall crazy fun, a cake might be the direction you're looking for.

The verdict is yours to decide.  So what will it be...?  Cakes...or cupcakes...??


Sunday, June 23, 2013

Reviewing For You: Freestanding Paper Baking Cups

Product: Freestanding paper baking cups.  Many companies sell them, and they come in all sorts of shapes and sizes.  For this blog post, we used the muffin top baking cup that are sold through Jo Ann Fabric stores.


Claim to Fame: These new products are currently flooding the baking market right now with promises of perfect baked goods and no need for heavy and clunky bakeware taking up precious storage space.  For most cupcake wrappers, they need to be nestled into a cupcake tin to keep their shapes while they bake.  These baking cups can be baked on a simple cookie sheet.  And with dozens of sizes and designs, including a loaf pan and bunt cake, the baking possibilities just opened up!

Price: $ ($0 - $10) The price of these products ranges, depending on where you buy them and what you're buying.  Smaller cupcake baking cups may run $4-$5, while a package of bunt cake liners may run $8-$10. It sounds expensive considering you can buy 75 cupcake liners for $2, but it's sadly the trade off you have to make for a product like this.

Testing It Out: One of the worst mistakes we ever made in our early baking career was trying to make some no-bake cupcakes on a hot July day.  The cupcakes were fine...for the first 20 minutes or so.  As soon as they began to warm up even the slightest bit, they expanded the regular cupcake liners, eventually causing them to spill out all over the place.  It was seriously such a train wreck.  For our test, then, we decided to try these out with another round of no bake cupcakes...this time, though, we would try these new freestanding cups.

After we lined the bottom of each liner with some great cookie crust, we loaded it up with a cool peanut butter whipped topping and then then covered it all with some chocolate.  Into the fridge it went for an hour to set, then we pulled it out to see what the results were.


The Results: We are loving the results!  They just came out a few hours ago, so maybe we'll change our stance when we've had these for a day or two, but the shape is holding up wonderfully!  Instead of resembling a melted Popsicle, these looked like no-bake cupcakes.  Imagine that!!  

Final Verdict:  These performed spectacularly for us.  They held up just as promised, and we loved how painless they were to use.  A little expensive as far as cupcake liners are concerned, but for unusual circumstances (like no bake cupcakes) there's nothing better in our opinion

*As a note, we also did try to bake with these (yes, that meant turning on the dreaded over on an 87 degree day) and these are excellent if you need to stick it in the over too.  We simply put it on a cookie sheet, slid it into the over, and in 20 minutes had some amazing cupcakes to munch on.  If you need to bake with these too, they work wonders.

Rating: **** out of ***** The only downfall to these freestanding baking liners is the price.  These would be a perfect 5 out of 5 stars if the price was just a little lower.  Nevertheless, this is a great product, and we highly recommend them.  We hope they keep rolling out new sizes/designs/colors, because we might become big investors in these.